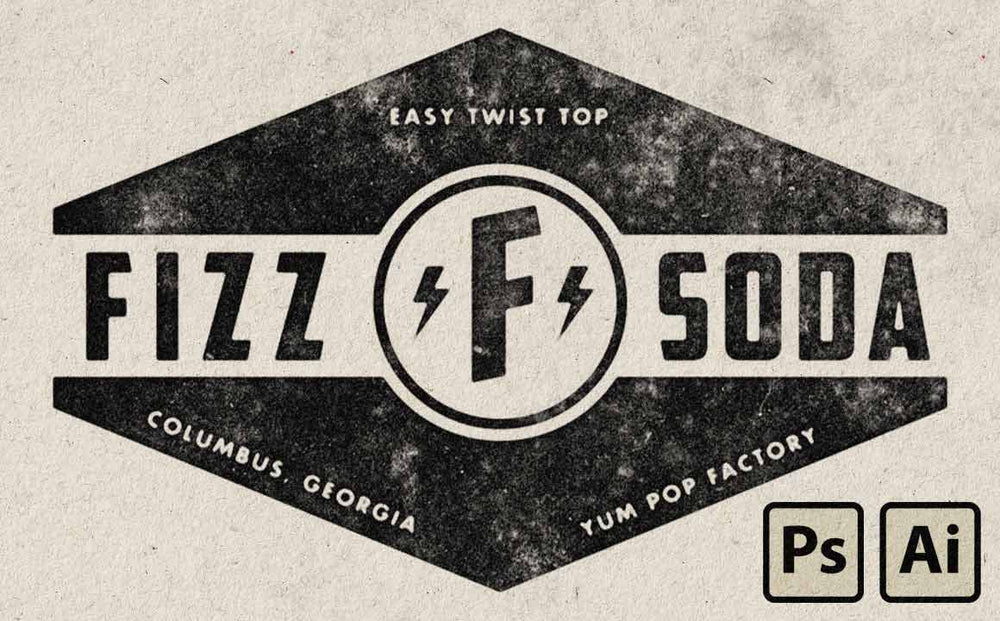
I'm a total sucker for label and logo design from the '40s and '50s. In this tutorial, I'll walk you step-by-step how to create a distressed retro logo in Illustrator and Photoshop.
Plus, I've included some freebies that make it easy to follow along.
Free Resources
- American Captain Font (Free for Personal Use)
- SuperGrain Sample PSD
- Complete vector logo (for reference)

Step 1. Begin by creating an 1160x772 artboard in Illustrator. Add a background in an off white color. I'm using #EDE8DB. Lock the background by choosing Object > Lock > Selection.

Step 2. Download the font American Captain here. Now type the words Fizz and Soda as separate text blocks. Make sure they are horizontally aligned using the Vertical Align Center option in the Align box.
[Note: Be sure to follow license guidelines for the font. You may need to pay to use this font in commercial work.]

Step 3. Select the Polygon Tool. Make sure you have just the fill turned on and no stroke. Use your cursor to drag out a polygon and then use the up arrow to increase it to a 6 sided polygon. Be sure to hold down shift before letting go of your mouse to keep the polygon aligned neatly.

Step 4. Make sure your words are grouped (Object > Group > Selection). Now vertically and horizontally align both the words and hexagon using the Align panel.
Select your text, make the fill white (so you can see it in contrast to red hexagon), and bring it to the front (Object > Arrange > Bring to Front).
Finally adjust your hexagon to fit your text. Use the Selection Tool, hold the Alt key to move both sides out equally. I also used my Direct Selection Tool to raise the top point and lower the bottom point.

Step 5. Make your fill color white (#FFFFFF) and use the Rectangle Tool and Ellipse Tool to create the area that will be removed from the hexagon to make room for the text and large F in the middle of the logo.
I also added the inner circle while I was at it. I did this by selecting the circle, duplicating it using Command+C (Duplicate) then Command+F (Place in Front), and then use the Alt key while I shrunk the new circle down. Finally, I removed the fill and added an 8.5 point red stroke (#EA212D).

Step 6. Using the Pathfinder panel select your rectangle and circle and click Unite.

Step 7. Select the hexagon and your combined circle and triangle. Make sure the circle and triangle you combined are in front of the hexagon and click Minus Front from your Pathfinder panel.

Step 8. Now let's add our F to the circular area. Using the American Captain font create an F. With the letter F selected choose Object > Transform > Shear and use the settings in the photo above.

Step 9. Our retro logo is shaping up pretty nicely. Now for the fun part, adding the little details.
I've used Futura Bold (you probably have a basic Futura pre-installed on your computer) to add fun details like the manufacturing location, company name, and bottle opening instructions.
I've also added a white hexagon background to replicate the look of a sticker that might be placed on a bottle.

Step 10. Now to take care of some little details. Convert your text to outlines by selecting it then choosing Type > Create Outlines.
Finally, let's get our circle with the red stroke and turn it into an outline by selecting Object > Expand...

Step 11. Finally, select your outlined words in Futura and select the hexagon and click Subtract Front from the Pathfinder window.
Tip: You might have to select the hexagon first and choose Object > Compound Path > Make.

Step 12. Okay, now for the easy part. Download the SuperGrain sample PSD and open it in Photoshop. In the top of the Layers panel you'll see a layer titled "Double Click to Add Your Design". Double click on that!
A new file will open. Copy the red part of your work from Illustrator (Command+C) and paste it as a Smart Object into the Photoshop file. Lastly, toggle the SuperGrain logo off.
Click File > Save.

Step 13. Close the Photoshop file you just saved. You should now see your retro logo automatically distressed by your SuperGrain Sample PSD.
That's it. SuperGrain makes distressing and adding the final touches to your work take a matter of seconds.
Conclusion
If you followed along with the complete tutorial you now know how to build a retro-inspired logo in Illustrator using type, shapes and the Pathfinder tool.
As you can imagine, you can use these techniques to create a wide variety of different retro-inspired logos.
Get the Complete SuperGrain Pack
Love how easy SuperGrain made it to distress your work? Purchase the complete SuperGrain Kit and get dozens of other features including:
- Dozens of built-in grunge textures (so you can get infinite texture effects)
- 100% control of the intensity, contrast, color, and background color
- A set of our famous RetroSupply brushes (small ink splatters) to add final touches
- Portrait and Landscape versions
- Full color instruction PDF for easy reference
- SuperGrain tutorial video with extra tips and tricks to get any custom look you want
- Our handy Grain Reverse effect that puts your design on an ink black background


